Designed Stairs

Designed Stairs has the experience to design structural, open-riser staircases that are also beautiful works of contemporary art.

  • Getting the Most from Your Stair Dollar — Material

    Part 4 of 4

    Materials in stock are less expensive — e.g., red oak is the most common hardwood and among the least expensive.

    As with styles, components made from wood species that are stocked will always cost less than custom orders. We have noticed a trend over the past eight to ten years to natural or brown toned species such as walnut and white oak. Within the United States, red oak is the most common hardwood and consequently, one of the least expensive.

  • Getting the Most from Your Stair Dollar — Shape

    Part 2 of 4 — Shape

    In the last blog, Getting the Most from Your Stair Dollar (Part 1), we introduced the three basic factors to keep in mind when thinking of your stair budget. Here we’ll explore the first of those three factors: Shape.

    A straight stair is the least costly and also takes up the least amount of space. The money saved on a straight stair could be used to upgrade your railing style or material.

    A landing stair will cost more due to the landings themselves and the added newels and rail intersections.

    Winder stairs are more expensive than landing stairs due to the installation of winder treads, winder newels and rail intersections. Winder stairs may also be subject to restrictive building codes. Check with your local building department.

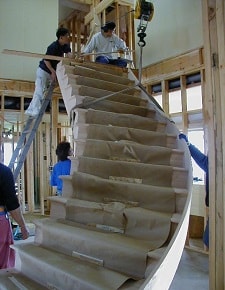
    Curved staircases are the most expensive due to the handmade nature of the components.

    Straight stairs
    Straight

    Straight stairs
    Landing

    Straight stairs
    Winder

    Straight stairs
    Curved

  • Getting the Most from Your Stair Dollar

    Part 1 of 4 — Overview

    Milled stairs may cost from $2,000 for a hardwood stair with wall rails, to $200,000 on the high end.  Most of us are shopping in the $5,000–20,000 range.

    When designing your stair and railing plan, there are three basic factors to keep in mind in order to use your budget wisely: shape, style, and material.

    If you have the luxury of starting from the general shape of your stair (new construction in the blueprint design stage) consider the shape first.  If your space/shape is already defined, it may limit controlling that aspect of your budget, but there are still two aspects to consider.

    Which is more important to you: style or material?  If are you are dead set on walnut, you may need to look at mixing it with stocked poplar parts for balusters and newels. If you have a style you are set on, such as stainless cable, most of your budget will go to that, and you may consider a simpler oak stair.

  • Curved Assembled Stairs

    Curved Assembled Stairs

    At Designed Stairs we rate the difficulty of installation on a scale of 1 to 5, with level 1 being the simplest to install for a good trim carpenter, and level 5 requiring the highest level of stair installation specialist. Most often, curved stairs are categorized as level 1 or level 2. This makes assembled curved stairs a great option for some builders. We take care of the designing and building processes, and your trim carpenters take care of the installation.

    Here’s how it works:

    We start by looking at the plans to determine if assembled stairs will work for the specific project.  It is important to consider things like the shape and configuration of the stairs, if they will fit through the door assembled, among other factors. 

    Our technicians and engineer fine tune the stair’s design for the final product to flow beautifully as one piece, considering any transitions between multiple radii on the stringers and rails. 

    We can provide framing details for the walls around the stairs as needed to make sure that the stairs will fit precisely on site.  We then build this same framing on the decks at our shop to build the stairs and fit the rails to.  Once completed, the stair is taken down in one piece and the rail in a separate piece for delivery.  Delivery is provided by Designed Stairs throughout our standard service area (all of Chicagoland, NW Indiana, and SE Wisconsin) and by common carrier elsewhere. 

    Once the stair is on site, installation is very straightforward, and we provide any instructions needed.  Since the stair is in one piece, it only needs to be fit at the header and the rest will fall into place.  At this point, the curved walls around the stairs can be framed.  Once newels are fit, rails can be installed quickly since they are already fit to the stair. 

    For more complex stairs, we offer full installation throughout the Chicagoland and installation training or assistance by one of our level 5 skill installers in any location.  This is a great option if you have a highly skilled trim carpentry team that just needs some specific direction. 


    /

    /

    /

  • How to Fix a Squeaking Stair

    A squeak in a stair is generally caused as the lumber dries out over time. Hardwoods are regulated by industry standards for a moisture content of 6-8%. This matches the moisture content inside the average home and allows the wood to remain stable under normal conditions.

    Pine (grades used for basement stairs and stairs to be fully covered with carpet) has a typical high moisture content of 12-16%. Over time as pine shrinks built stairs will begin to squeak.

    If your stair is squeaking, check the humidity level in your home as a first step. Verify where the squeak is coming from. You may hear a squeak walking up the stair, but it could be coming from the framing material rubbing against the stair, and not the stair itself.

    Tools to fix a squeaking stair

    How to Fix

    You can typically fix the squeak, as simply as “toe nailing”* a long nail or two in the area that is squeaking. That is not to say more squeaks won’t develop over time, as the lumber continues to dry out to equal the humidity level of your home.

    *Toenailing: driving a nail at an angle into a board. It makes a strong joint while it also pulls joining boards into position.