Designed Stairs

Designed Stairs has the experience to design structural, open-riser staircases that are also beautiful works of contemporary art.

  • Transforming Your Home by Installing a Hardwood Stair

    We get many calls where people no longer want carpet on their stairs and want to upgrade to a custom hardwood stair. What most people don’t realize is that stairs are a structural item. Stairs don’t come out easily. Replacing a stair is a real remodeling project and not just a decorating project.

    A first question is often “can you just leave in my stair and cover over it with hardwood?” In many cases we can (and sometimes we cannot). Realize there are down sides to covering an existing stair.

    Here is a short blog to explain some pros and cons to consider: Covering Stairs with Hardwood or Replace with New Stairs?

    Once you are committed to a stair replacement, here is an idea of what to expect. The old stair will be torn out and this usually means removing some drywall in the process. Consider hiring a contractor for the demo, new framing and drywall that is likely to be required. At times there are surprises at tear out such as plumbing, electric or duct work under the stair may need to be moved for a new stair design. If you are living in the house, schedule the tear out just a day or two before the new stair is installed. This will limit the time you do not have stair access to the 2nd floor. If you are not comfortable using a ladder for a day or two, consider sleeping elsewhere during the stair remodel. Once the new stair is installed, drywall has to replaced, taped sanded and painted. The stair will need to be stained/painted.

    Putting a new stair into your existing home will transform your home’s interior like few other things can.

    After hardwood stair replacement

    Before hardwood stair replacement

  • Why are descending volutes used?

    A volute is that “Curly” piece that is at the start of many stair rails.

    Standard Volute
    This photo shows a manufactured volute with a manufactured up ease fitting. The up ease fitting is the connector between the volute and rake rail.

    A standard volute shape will have a rail fitting attached to it, called an “up easing”. The up easing allows the rail that is coming down the rake of the stair to level out into the volute.

    On many curved staircases, keeping the rail to a consistent height as it curves up the rake requires a special handmade volute called a “descending volute” or a “climbing volute”.

    Descending Volute Handcarved
    The volute in this photo, is connected to the rake rail with a much longer and slightly twisting hand carved descending up ease fitting.

    This type of a volute is a “hand carved fitting” that requires many hours of experienced layout skills to understand what is needed in each unique situation. The carving work on fittings can take anywhere from 4 hours to over 40 hours of experienced rail carving labor. The result is a beautiful, one of a kind piece that is unique to the stair that it was made for.

    More and more we see descending volutes used on stairs that are not curved. They are desired for their strong artistic statement and elegant beauty. For more on carving rails, see Hand Carving Stair Railings.

  • Hand Carving Stair Railings

    Stair railings curved cap

    Often curved staircases, and occasionally straight stairs, have complicated railing requirements calling for twisting and turning of the rails that cannot be made by bending the rail or with machines. In these cases, we must create a “hand carved fitting” specifically for the need of this particular application.

    The process starts with a meticulous design based on the math of the staircase calculated in three dimensions. Then, the selection of heavy planks of the very best wood available is carefully cut and glued into a block large enough for the piece. The blocks are rough shaped with a band saw and sander to get the closest rough shape, and then it is all chisels and hand tools from there.

    Stair railings curved carving

    Hand carving fittings can take anywhere from 10 to 100 hours, depending on the size and style. It is a task that requires expert knowledge of the process and razor sharp tools.

    Curved Stair Shopping Tips

    When shopping for a curved stair ask questions:

    • Have you made hand carved fittings on your curved stairs?
    • How many hand carved fittings have you made for curved stairs?
    • When are hand carved fittings needed in curved rails?

    If they have never a hand carved a fitting and can’t tell you when rails need to be hand carved, there is a fair chance you will end up with an odd looking railing. Hand carved fittings are in about 50% of the curved stairs we design and build. Some curved stairs have as many 3 in one curved railing section.

  • Flooring Thickness Plays a Key Role in Your Stair

    Stair nosing for hold up

    Flooring should be decided upon before you finalize your stair design. Your flooring is typically not installed until after your mill-made stair is in. By planning ahead, you can allow for your flooring (thickness) when calculating the stair, and it will make installation cleaner and simplier.

    When Calculating the Stair

    The finished flooring thickness at the bottom and top of your stair should be factored into the overall rise. By doing this, you assure that each individual rise will be a consistent height, and the flooring will flow right into the stair without gaps. By calculating your riser height from “finished floor” to “finished floor”, you can be assured that your riser height will be consistent for each step. For example:

    • Rough floor to rough floor height [= 121″]
    • – subtract the thickness of your finished flooring on the first floor [- 3/4″]
    • + add the finished flooring on the top floor [+ 1/2″]
    • = your rise finished floor to finished floor [120.75″]
    • Figure your individual rise; divide the overall rise by the number of risers [120.75/16 rise = 7.546″ per riser height]

    Had you not factored your finished flooring into the overall rise, the stair would be installed and then 3/4″ flooring would butt up to the first riser, making the first rise 3/4″ shorter than the rest. Not only would this be a trip hazard, it would not pass inspection in most areas.

    At Installation

    At Designed Stairs, we apply a “Hold Up Block” at the bottom of the stair, under the first rise. This allows the riser to, in effect, float. When flooring is installed, it can easily slide under the riser. With this method, there is no need for special cutting of flooring materials, and it finishes out to a neat and clean look without gaps!

    At the top of the stair, the nosing is held up so the flooring can butt up to it. If hardwood, the hold up is the same as the wood flooring thickness (typically 3/4″, as in photo). If it’s carpet, typically you want to hold it up about 3/8″. This allows for the padding and bit of the carpet. You don’t want to hold it up so much that you create an “edge” on the wood nosing. That edge would get beat up over time. The wood edge should be nearly buried in the carpet.

    When walking a stair, a consistent rise is important. It is amazing how much our body feels an inconsistent step (more than our eyes can see it).

  • Timing is Everything with a Curved Staircase Installation

    Curved Stair Chicago

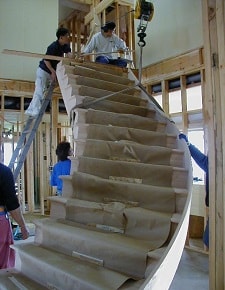
    Curved staircases like straight stairs, should be installed after your drywall is primed and before your finished flooring is laid.

    Curved staircases and rails take a considerable amount of time to build, so getting the stairs ordered early will help avoid any delays once your site is ready. It is likely that you will need to place your curved stair order eight or more weeks before your site is drywalled.

    We all know the negative effects of scheduling too late; we wait and the job is delayed. But in the case of a curved stair, scheduling it too early is just as bad. Many of your curved stair components are glue laminated to curves that are specific to your framing. Once fabricated, it’s critical to get them installed quickly. Installation “locks” the curved parts into position.

    On the other hand, once a curved staircase is fabricated, and the job site is not ready, there is no choice but to store the components. Storing curved parts for any length of time can cause reactions from both pressure and atmospheric (weather) conditions that can actually change the shape of the parts. At a minimum, installation is more difficult, and in the worse case, parts need to be remade.

    To ensure the best possible results, take extra care with your schedule and eliminate any storage possibilities during the process.

  • Curved Assembled Stairs

    Curved Assembled Stairs

    At Designed Stairs we rate the difficulty of installation on a scale of 1 to 5, with level 1 being the simplest to install for a good trim carpenter, and level 5 requiring the highest level of stair installation specialist. Most often, curved stairs are categorized as level 1 or level 2. This makes assembled curved stairs a great option for some builders. We take care of the designing and building processes, and your trim carpenters take care of the installation.

    Here’s how it works:

    We start by looking at the plans to determine if assembled stairs will work for the specific project.  It is important to consider things like the shape and configuration of the stairs, if they will fit through the door assembled, among other factors. 

    Our technicians and engineer fine tune the stair’s design for the final product to flow beautifully as one piece, considering any transitions between multiple radii on the stringers and rails. 

    We can provide framing details for the walls around the stairs as needed to make sure that the stairs will fit precisely on site.  We then build this same framing on the decks at our shop to build the stairs and fit the rails to.  Once completed, the stair is taken down in one piece and the rail in a separate piece for delivery.  Delivery is provided by Designed Stairs throughout our standard service area (all of Chicagoland, NW Indiana, and SE Wisconsin) and by common carrier elsewhere. 

    Once the stair is on site, installation is very straightforward, and we provide any instructions needed.  Since the stair is in one piece, it only needs to be fit at the header and the rest will fall into place.  At this point, the curved walls around the stairs can be framed.  Once newels are fit, rails can be installed quickly since they are already fit to the stair. 

    For more complex stairs, we offer full installation throughout the Chicagoland and installation training or assistance by one of our level 5 skill installers in any location.  This is a great option if you have a highly skilled trim carpentry team that just needs some specific direction. 


    /

    /

    /

  • Premium Wood Stairs for Outdoor Living

    Ipe — a tropical hardwood

    More and more we are investing in the highest quality products for outdoor living spaces. We want our outdoor space to be another room to relax and entertain in. No longer is the “deck” stair enough, we want top of the line, indoor quality stairs and railings for our outdoor spaces.

    When designing a top quality stair for outdoor living, choose your material carefully. Consider species that can stand up to water, insects, along with heat and humidity fluctuations.

    Softwoods often used for outdoor applications are Cedar and Redwood. Cedar is the most poplar and most available. A downside to Cedar is that it is so soft that some cedar can be dented by just a fingernail. For that reason it is not the best choice for stairs. Redwood on the other hand is harder (than cedar), and has a beautiful red color. These soft woods tend to have more movement (as they age) and the design of the stair will need to be adjusted to allow for that greater wood movement. Typically when we think of premium stairs, we think in terms of hardwoods.

    Even stairs designed for beauty should be ready to handle 25 (or more) years of heavy traffic. Teak and Ipe work very well for these high quality applications. Teak has a high oil content that makes it excellent for mildew resistance. Teak has very little movement and shrinkage, and ages to a nice grayish color. The down side of teak is its cost. Ipe on the other hand is still an excellent hardwood for outdoor use. It too is insect resistant and a good hardwood choice for stairs. Ipe will cost about 25 to 50 percent more than cedar and redwood, but only about one third the cost of teak.

  • Custom Wood Stair Treads to Match Your Flooring

    Custom wood treads to match hardwood flooring

    Twenty years ago if you wanted hardwood flooring, it was pretty much limited to “red oak 2-1/4″ strips”. Today we can choose from imported tropical hardwoods, and engineered flooring from laminates to bamboo, in a variety of widths. Our old favorite, red oak is now readily available knotty and rustically scraped.

    Typically stair treads are matched to the flooring. In many cases stair treads are not available in these custom species, and treads will need to be custom made. This does not present a problem for a custom stair company, however it will increase the cost of your stair.

    Stair treads are typically 1″ to 1-1/16″ thick, while flooring is 3/4″, therefore flooring material is not used for treads. Lumber in the same species is used to make the treads. In flooring, edges are not exposed, however treads have a front nose that exposes the full edge of the material. Engineered or laminated materials are not used for treads, as their layers would be visible on the front edge. It is best to use solid materials for treads.

    In cases of the most premium species like Tuscan Olive Wood or Golden Acacia, the lumber is limited, and often not available in the thicker cuts needed for stair treads. In these cases, the thinner cuts must be face glued on another wood to get the tread thick enough. A custom nose is made and attached to the tread front. This adds quite a bit of labor and therefore cost to the treads. The price of custom species stair treads has no relation to the price of the same species of flooring.

    It is not uncommon for customers to have their flooring purchased or even installed, when they price out their stair (treads). Matching custom species can cost more than than they expect. To manage to your budget, prior to purchasing your flooring, contact your stair company and cost out the treads in that species to verify that the treads can be made within your budget.

  • Choosing a Hardwood for your Staircase: Understanding Grain for your Design

    There are two main design features to consider as you select a wood for your trim: color and grain. Color can be adjusted through stain, while grain gives the wood its style and character. Grain is the more important consideration when choosing your wood.


    Straight Grain Oak

    If you are leaning towards a modern or even elegant feel, a closed grain wood may be the way you want to go. Examples of wood with very little graining: Hard Maple, Poplar, Beach, and Birch.

    Straight Grain became popular in the Arts and Crafts period in styles such as Prairie and Mission, in the early 1900s. Today, you see it in contemporary designs too. Straight grain is achieved by using full grain woods, but cutting of the log at a different angle. We most often see straight grain as “quarter sawn” or “rift sawn” oak.


    Full Grain Oak

    Full Grain is referred to as “plain sawn” and is often thought to be “hardy” in its appearance, and at times even rustic with a natural elegance. Oak has a hardy solid feel, while walnut blends the solid feel with a bit more elegance.

    There are so many beautiful woods available today, it can be hard to select just one for your project. By making initial decisions based on grain, you will select the right wood species for the style you are designing.

    Visit our Materials page for the 27 most poplar hardwoods we build custom stairs in.

  • Choosing a Hardwood for your Staircase: Wood Color

    Walnut for a traditional stair color

    There are several species of hardwoods that have very bold natural color, such as cherry, walnut, and mahogany. Historically these were the most desirable woods, due to their natural beauty and no need to stain or color them.

    These woods have long demanded premium prices.

    Other species of hardwoods may have more subtle color, but they still do have an underlying color that will be more apparent when the finish is applied. For example, red oak has a naturally pinkish hue; white oak is more neutral or slightly brownish. The same can be said of birch, maple and many other species. There are slight variations in their natural color. These woods tend to cost less than those species with a bold natural color.

    If budget constrains you, do not hesitate to buy a more affordable hardwood and stain it to look like a premium naturally colored hardwood. It’s no wonder most of the stain colors we buy at the paint shop have these naturally colored woods as their names. It allows us to mask other species to have their color.

    With all the stain choices we have today that are easy to use, wood color should not be your first design concern when selecting the wood for your stair. (See more on our Materials page.)